In the final installment of the Getting Drive Info series (Part 1, Part 2, Part 3, Part 4), SSIS will again be used to collect and save the drive information. This WMI Data Reader Task will be used to collect the drive information.
WMI, Windows Management Instrumentation, is the Microsoft implementation of the industry standard Web-based Enterprise Management, WBEM, using the Common Information Model, CIM. WMI provides easy access to information about the computer hardware and software via classes like Win32_LogicalDisk. The classes can be queried with a SQL like language called WQL (SQL for WMI).
WMI Data Reader Task
The package uses the WMI Data Reader Task to gather the disk information. It requires a WMI connection and a WQL query to define what information to gather and from where.
Let’s start with the WMI connection configuration. Right click in the BIDS Connection Managers pane and click on New Connection… which will pop up the Add SSIS Connection Manager dialog.

Select WMI and click the Add… button. The WMI Connection Manager Editor will be displayed.

Configuring the WMI connection for the local computer is fairly simple. Set it up as shown above with the name of your choice of course and click OK. This configuration will only work if the account that the package will run under has rights to read data from the WMI provider. If there are security issues reading WMI data, other credentials will need to be provided or the account that runs the package given the rights to query the WMI provider.
In the case where the server being queried for WMI data is not the computer the package is running on, credentials will need to be supplied. If the account that is running the package has access on this other computer, then checking Use Windows Authentication should work. When the other computer is in a different domain or the account running the package does not have access, then a windows user and password will need to be supplied. This can be a domain account or a local windows account on the other computer. Always supply the user name with a domain or the other computer name. In highly secure environments remote WMI security access may need to be configured on the other computer. WMI security configuration will not be covered here.
The Namespace property can usually be set to \root\cimv2. There will be cases when the WMI class to be queried is under a different WMI namespace. These other namespaces can be browsed WMI CMI Studio or Scriptomatic 2.0. I also recommend these tools to browse the classes available and see the properties and values. A sample of the namespaces available is shown below.

Now that the connection is configured, work can begin on the WMI Data Reader Task.
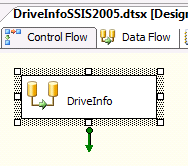
Create a WMI Data Reader Task on the Control Flow designer pane.

Open the WMI Data Reader Editor. The SQL Server 2005 version is displayed. The SQL Server 2008 version has an additional editor called General when the Name and Description of the task can be set.

Let’s setup the WMI Options.
The WmiConnection has been set the one configured above.
WqlQuerySourceType is set to Direct Input, since the query will be statically defined in the WqlQuerySource property. WqlQuerySourceType can also be set to File connection or Variable. Use File connection if the query is defined in a file. Variable would be used if the query needs to be dynamic. A dynamic query is usually required if the WMI Data Reader Task is placed in a looping container or the query is dependent on the results of a previous task in the package.
WqlQuerySource needs to be set to a valid WQL query. In order to get the drive information, there are 2 different WMI classes that could be queried. The first, Win32_LogicalDisk, only seems to handle local attached storage. The query to get the drive information is:
SELECT DeviceId, Size, FreeSpace FROM Win32_LogicalDisk WHERE DriveType = 3
The other class to try is Win32_Volume. This class would probably need to be used to get the information for mount points. (Thanks Dave Levy!) Here is the query:
SELECT DriveLetter, Capacity, FreeSpace FROM Win32_Volume WHERE DriveType = 3
DriveType 3 limits the query to fixed drives. DriveType 2, removable drives, may need to be included. Add OR DriveType = 2 to the queries if all the drives expected are not being returned.
OutputType should be set to Data table so that the results from multiple drives can be returned. The data will end up in a variable that we will define later. The other values for OutputType are Property name and value and Property value.
OverwriteDestination should be set to OverwriteDestination. The other values are Keep Original and Append to destination. The SQL Server 2008 editor disables this property which really makes more sense when writing to a variable.
DestinationType should be set to Variable. The other value is File connection. Use File connection when the data needs to be written to a file. Changing this property changes the options in the next property Destination.
Destination should be set to a variable of type Object. The variable DriveInfo can be created from here or beforehand from the variables browser. Remember to watch the variable scoping. It should scoped at the package level.

That completes the configuration of the WMI Data Reader Task.
Data Flow Tasks
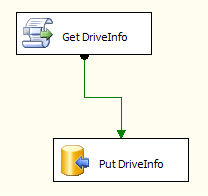
The contents of the DriveInfo variable need to be processed with a Data Flow Task. This will be accomplished with a Script Component used as a data source feeding an Oledb destination that will write the drive information to a table.
Create a Data Flow Task on the Control Flow designer pane and connect the WMI Data Reader Task to it.

The Script Component
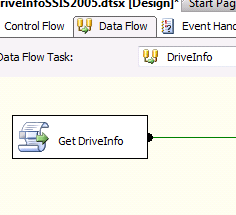
Switch over to the Data Flow designer pane and drag a Script Component object from the Data Flow Transformations section of the Toolbox. The Select Script Component Type will appear. The Script Component can be a source of data, a transformer of data or a consumer of data. Choose Source as this Script Component is going to provide drive information in a format that an Oledb provider can consume and click OK. Rename the Script Component Get DriveInfo. All of the images below came from BIDS 2005. BIDS 2008 is slightly different.

Rename the Script Component Get DriveInfo.

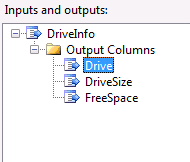
Double click on the Script Component to open the editor. In SQL Server 2008 the Script editor is the default. Click on Inputs and Outputs first to display that editor. Now let’s add some output columns. Rename Output 0 to DriveInfo and add the columns:
- Drive, data type string [DT_STR]
- DriveSize, data type float [DT_R4]
- FreeSpace, data type float [DT_R4]

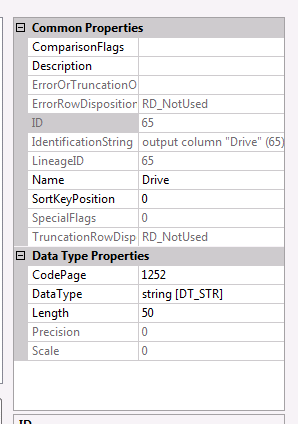
Here are the column property details for the Drive column.

It is important to define the output columns first so they show up in the OutputBuffer object while the coding the script. The output buffer will be named DriveInfoBuffer in this case.
Switch Script Transformation editor to Script mode by clicking on Script in the left pane.

The ReadOnlyVariables property in the Custom Properties section needs to be set to User::DriveInfo so that the Data Table filled by the WMI Data Reader Task can be processed by the Script Component.

Now it’s time to add the code to get the drive information and send it to the output buffer. Click the Design Script… button and add the code below. The sample code is for the Win32_LogicalDisk query. If Win32_Volume is being used, change the column names to match that WMI query. Note that the User::DriveInfo variable has to be converted to a DataTable type. Here is the code in VB.Net for SSIS 2005.
Imports System
Imports System.Data
Imports System.Math
Imports Microsoft.SqlServer.Dts.Pipeline.Wrapper
Imports Microsoft.SqlServer.Dts.Runtime.Wrapper

Public Class ScriptMain
    Inherits UserComponent

    Public Overrides Sub CreateNewOutputRows()
        Dim dr As DataRow
        Dim dt As DataTable

        dt = CType(Variables.DriveInfo, DataTable)
        For Each dr In dt.Rows
            DriveInfoBuffer.AddRow()
            DriveInfoBuffer.Drive = dr("DeviceId").ToString()
            DriveInfoBuffer.TotalSize = CType(dr("Size"), Single)
            DriveInfoBuffer.FreeSpace = CType(dr("FreeSpace"), Single)
        Next
    End Sub

End Class
Here is the code in C# for SSIS 2008.
Make sure to set the ScriptLanguage property to Microsoft Visual C# 2008 in BIDS 2008 before clicking the Edit Script… button and pasting in the code below.

using System;
using System.Data;
using System.IO;
using Microsoft.SqlServer.Dts.Pipeline.Wrapper;
using Microsoft.SqlServer.Dts.Runtime.Wrapper;

[Microsoft.SqlServer.Dts.Pipeline.SSISScriptComponentEntryPointAttribute]
public class ScriptMain : UserComponent
{
    public override void PreExecute()
    {
        base.PreExecute();
    }

    public override void PostExecute()
    {
        base.PostExecute();
    }

    public override void CreateNewOutputRows()
    {
        DataTable di = (DataTable)Variables.DriveInfo;

        foreach (DataRow dr in di.Rows)
        {
            DriveInfoBuffer.AddRow();
            DriveInfoBuffer.Drive = dr["DeviceId"].ToString();
            DriveInfoBuffer.TotalSize = Convert.ToSingle(dr["Size"]);
            DriveInfoBuffer.FreeSpace = Convert.ToSingle(dr["FreeSpace"]);
        }
    }

}
Now we need to add the destination to store the drive information. Grab the OLE DB Destination from the Data Flow Destinations of the Toolbox and drag it onto the Data Flow designer and name it Put DriveInfo. Connect the output of the Get DriveInfo Script Component to Put DriveInfo.

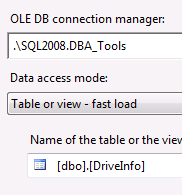
In the OLE DB Destination Editor, set the OLE DB connection manager to the DBA_Tools connection created earlier and pick the DriveInfo table from the table or view drop down.

Here is the create table statement for the DriveInfo table used in the earlier parts of the series.
CREATE TABLE dbo.DriveInfo
( Drive VARCHAR(255)
, DriveSize FLOAT
, FreeSpace FLOAT)
Run the package and all the drive information for the computer should be stored in the DriveInfo table.
That concludes the Drive Information series. This is great pattern to follow to get any information via WMI and store it in a central database for server reporting. Have fun experimenting.